I was just reminded about Friends when Joey takes guitar lessons from Rachel. This is episode 11 in Series 5 The One With Lots of Resolutions.
When Phoebe finds out that Joey knows the real names of the chords, she flips out saying:
Phoebe: G-sharp? Have you been studying the real names of the chords? (Joey doesn’t answer.) Have you? (He looks away in shame.) Oh my God!
Joey: What?! I didn’t touch a guitar!
Phoebe: No, but you’re questioning my method!
Joey: No, I’m not questioning it, I’m saying it’s stupid!
Well, I’m sure my readers MUST have been practising on their own! Right? I promise I am not making any names up! I’m using the real names! Onwards and upwards. It’s time to do the first post! Yeah!
Actually, the hard part about the first post is deciding WHAT to write. I’m going to assume you already have something to post! So here goes!

Login to WordPress as usual. Then navigate on the top bar to ‘Write’ – it’s highlighted in white in the picture above. Click. After a few seconds, you’ll see the ‘write’ page open.
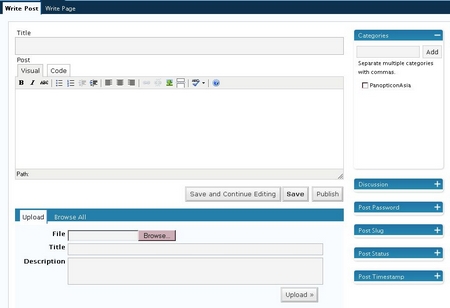
It looks pretty much like this. Let’s dive in.
To write your first post, you write the the name of your post in the ‘Title’ Area, and enter the content in the second box down (the big one!). You’ll see some very obvious tools to help you do your basic editing.
Basic Tools
The ‘B’ is BOLD, the ‘I’ is Italic, and the strikethrough, looks like abc. You can also see two kinds of bullets. Then you’ll see three kinds of indents (left, center, right). Next you’ll see the two undo/redo buttons. If you make a mistake, then hit ‘undo’. If you undo something you need, hit ‘redo’. Try it as you type.
Additional Tools (You can skip this section, if you need to)
The next is the image upload tool (We’ll leave that one today). Then there’s the ‘more’ button, ‘spell check’ and ‘help’. The ‘more button’ is simply to insert a click more button on the front page. It allows you to highlight a section, then readers will see ‘more’ on the front page. If they want to read more, they need to click it.
Saving and Publishing
We’re almost done for Part one of ‘posting’. But you’ll see three buttons below the box, called ‘Save and Continue’, ‘Save’ and ‘Publish’.
- ‘Save and Continue’ is for when you are in the middle of a post and, for whatever reason, you decide to save it (for safety?) so you can continue writing in a few minutes. Hit it and the screen will refresh in a few seconds, with the data displayed for you.
- ‘Save’ is for when you are done writing for now, but you are not ready to post. (For now, though, let’s not use that option!).
- ‘Publish’ is when you need to publish it so others can see what you wrote!
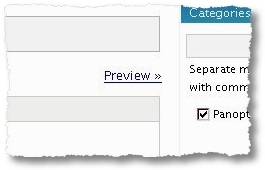
Once you hit ‘Save and Continue’, you should see a Preview button appear on the top right. If you click that, you’ll be able to see what the post will look like when it’s published.
See it’s painless! You just wrote your first post. Well done! Of course, I’ve not dealt with some important issues in this posting, such as categories, images, or some of the other options on the right and bottom of the screens. I’ll leave that for later lessons. But, for now, your homework is to post two post and send me screenshots so I can show off my ‘students work’!
{mailform}
If you are enjoying this series or find them useful, please do comment in the posts. Let me know what you need for future lessons. I’m planning on a series of 30 lessons, I just hope that readers find them useful!