 Colleen Lane from Tricities Real Estate recently wrote back asking how I did the pictures on the blog, especially her posting:
Thanks! That blog entry is very nice looking. Other that using screenshots, how are you doing the drop shadow, and especially the ‘ragged edge’ look you did on the resources image?
Colleen :o)
BlogDesk is the secret
 Naturally, I am reticent about telling ALL my little blogging secrets! Hah! Actually, I use BlogDesk, after trying a number of other blogging tools. In the end, despite the limited functionality for posting, I found that I could live with the limitations, but the tools for imaging really set this blogging tool apart from Qumana, w.Bloggar, and some of the others that I have tried. In fact, its import tool is very good at making the pictures look good, with edging, sizing, and positioning.
Imagine the Images
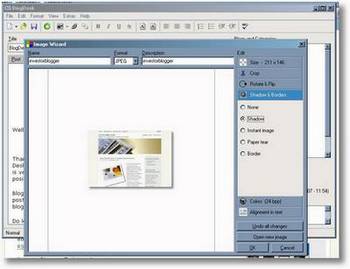
So I decided to focus my description only on the imaging aspects. In the left picture, you will see the imaging system, which is activated by clicking on the picture item in the top toolbar. You’re then given a simple “File Open” bar with a preview option. Find the location of the image you want to import, click on the file, preview it, then click “Open” to open the file.
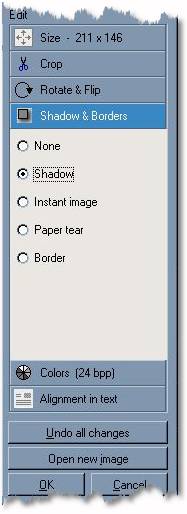
Options and Layering: Menu (right) and Sample (left)
You are then taken to the picture above, and you will see a list of options down the right hand side of the screen that include sizing, cropping, borders, rotation, colors and alignment. The first and most important step is to set the size of the image, so that it doesn’t exceed your blog’s maximum image size! You may need to play around with this the first few times to get it right.
 After that, you can adjust the other options as much as you wish. In fact, you can layer some of the effects nicely. For example, sometimes I layer a border around the image, then add a shadow or a make an instant image style. Other times, I might crop the picture, resize it, then add a tear border, like the picture here. To get the layered effect, you need to finish the first effect, then return to size, then add the next layer, and so on.
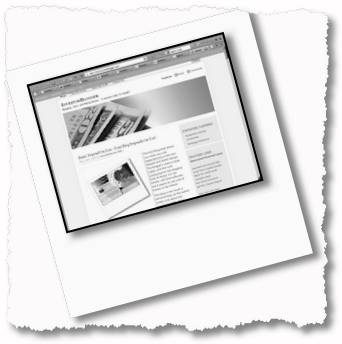
In the above picture, you’ll notice I took the same picture from the beginning of this post, I have added three or four layers: 1st is the border, then the shadow. Then I adjusted the size, and created an instant image effect. Finally, I added a tear on all four sides. This layering works upto a point, but it is easy to overdo it! My experience shows that two or three layers might be the most you can do!
I ended up removing w.Bloggar, Qumana, didn’t try LiveWriter, passed on Blogjet initially. I haven’t found anything as simple or as practical.
A Bugbear
I do have only one bugbear with BlogDesk and that is the posting times. I usually set my posts to be published at fixed times, but I am always getting the time wrong, because of the time difference between my Home in Taiwan and California Time – home of Dreamhost. As such, posts appear on the wrong day, in the wrong order or get published too early. Truthfully, this may not be BlogDesk’s problem, but some kind of offset would be good, so I avoid having to manage my posts after they are published.
Still, I’m rating BlogDesk very highly; but what blogging software do you use? Do you find anything practical?